You can make a real estate video in four steps: plan the shots, film the property on a phone, edit the clips with music and captions, then publish each cut to the right platform. A focused listing video takes about an hour the first time, and far less once you have a routine.
This guide walks through every step and hands you a copy-paste shot list, a phone settings cheat sheet, and a quick-start checklist. At the end, a faster path renders a finished video straight from your listing photos.
Plan your listing video
Planning decides the video. Before you film, write one sentence on the goal, choose the four or five rooms that sell the home, and order them into a shot list. Ten minutes of planning saves an hour of reshoots.
Start with the goal, because it sets the length and the tone. A listing tour walks a buyer through the home in 60 to 90 seconds, a just-listed teaser runs 15 to 20 seconds, and an agent intro puts your face on camera for about 30 seconds. Pick one goal per video.
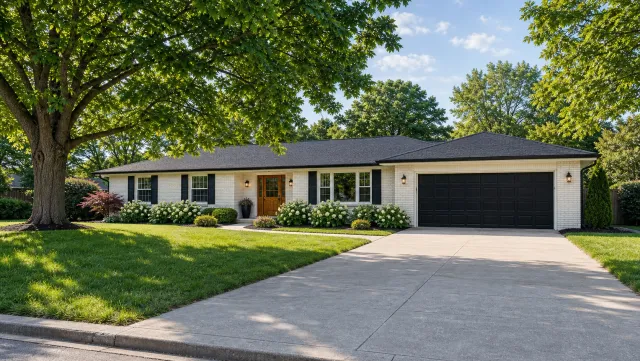
Then build the shot list in the order a buyer would walk the home. Open on the exterior as the hook, then move through the entry, the kitchen, the main living space, the primary suite, one standout feature, and a closing exterior. Capture each shot twice, a safe take and a better take.
For the strategy behind each clip, the real estate video marketing guide maps shots to buyer intent, and the real estate video hub covers the full program.
Decide orientation before you press record. Vertical 9:16 fills a phone screen for Reels, TikTok, and Shorts, where most property discovery happens, while horizontal 16:9 suits a website hero and YouTube. If you only film once, film vertical.
Gather your kit first, because the list is short: a phone from the last few years, a free editing app, and good light. Two optional upgrades pay off quickly, a small gimbal for smooth motion and a clip-on microphone for any on-camera talking.
Confirm a few facts before you arrive: the price, the bed and bath count, the square footage, and the one feature the seller is proudest of. Those details become your on-screen text and your script later.
Copy-paste shot list for a 60-second tour:
- Exterior approach, slow push toward the front door (hook)
- Entry or foyer, reveal as you step inside
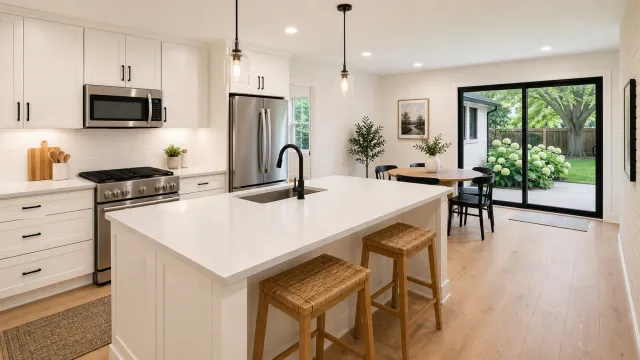
- Kitchen, one slow pan across the counters and island
- Main living space, wide shot then one detail
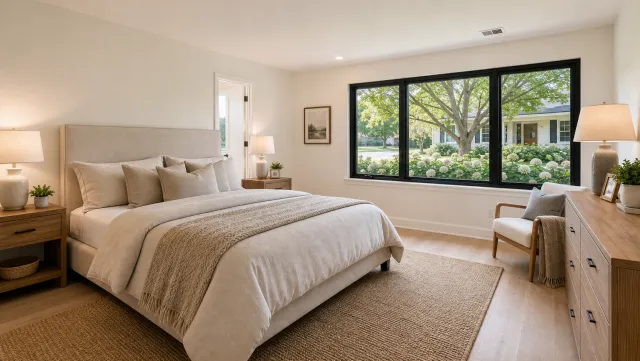
- Primary suite, doorway reveal into the room
- Standout feature, the reason this home sells
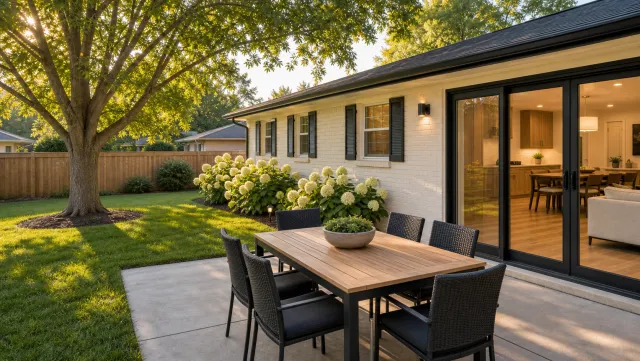
- Backyard or view, the emotional close
- Exterior again, end on the sign and your brand
Film the property with your phone
A modern phone films listing video that looks professional once you lock three things: exposure, focus, and stabilization. Shoot in 4K at 30 frames per second, turn on the grid, wipe the lens, and move slowly through each room.
Set the camera before the first take. Lock exposure and focus by tapping and holding the subject, so the image stays steady as you walk past windows. Shoot in 4K when storage allows, and keep the lens clean so bright kitchens stay sharp.
Stabilize the motion, because shaky footage reads as amateur faster than any other mistake. Hold the phone with two hands, tuck your elbows into your ribs, and walk heel to toe like you are carrying a full cup of coffee. A 30 dollar gimbal removes the last of the shake.
The real estate walkthrough video guide goes deeper on smooth movement through tight rooms.
Light the home with what it already has. Shoot at midday, open every blind and curtain, and turn on all the interior lights, even in daytime. Film away from bright windows so the glass stays bright behind your subject.
Record any voiceover separately in a quiet room afterward, because on-site sound picks up echo and traffic.
Capture transitions and detail shots while you are on site, because they make the edit feel produced. Film a few doorway push-ins to move between rooms, and grab close shots that sell the home: the faucet, the fireplace, the light through a window.
Phone settings cheat sheet:
| Setting | Use this | Why |
|---|---|---|
| Resolution | 4K (1080p if storage is tight) | Room to crop and stabilize |
| Frame rate | 30 fps | Natural motion for property tours |
| Grid | On | Level horizons and centered doorways |
| Exposure and focus | Tap and hold to lock | No flicker walking past windows |
| Orientation | Vertical 9:16 | Matches Reels, TikTok, and Shorts |
| Lens | Wipe clean before each home | Sharp kitchens and bright rooms |
Edit the video: cuts, music, captions
Edit a listing video in under twenty minutes: cut to the beat, trim every clip to two or three seconds, add captions, and end on your contact card. Free phone apps handle all of it.
Import your best takes and drop them onto the timeline in shot-list order. Trim each clip to two or three seconds, because a property video holds attention through pace. Add a licensed, upbeat track and let the cuts land on the beat.
Add captions and on-screen text next. Roughly 80 percent of social viewers watch on mute, so burn in captions and add text overlays for the price, the bed and bath count, and the address. Keep the text large and high contrast so it reads on a phone.
A free app such as CapCut, Canva, or InShot covers cuts, music, and captions, and a real estate video editor speeds the repetitive parts. The real estate video editing guide lists the full toolset.
Give the footage one quick color pass. Nudge the brightness and warmth so every room looks consistent, since clips shot near windows often come out cooler than the rest. A light, even look reads as professional even on a phone.
Finish with a clean export and a reusable template. Export at 1080p or higher, vertical for social and horizontal for your site. Save the project as a template so the next listing keeps the same intro, font, music, and outro.
Prebuilt real estate video templates give you that starting layout, and a real estate video maker automates the export to every size.
Watch for the four mistakes that mark a video as amateur: clips longer than three seconds, shaky footage, missing captions, and music louder than the voiceover. Fix each one in a single pass before you export.
Auto-make a video from your photos
If you would rather skip filming, you can auto-make a listing video from photos. PropFade animates each photo with motion, drafts a voiceover from the listing facts, adds captions, and renders a finished video in the format you choose in about two minutes.
This path fits the listings where filming is hard: vacant homes, bad weather, a full showing schedule, or a batch of ten listings. You upload 12 to 20 photos, confirm the listing facts, and export.
You pick the format up front — 9:16 for Reels, 1:1 for the feed, or 16:9 for your listing page — and PropFade exports the video in exactly that size.

5 listing photos
1 finished video
See finished output across property types on the real estate video examples page, then run your own photos through the trial.
Auto-make a listing video from photos
Upload your photos and get a finished video back in about two minutes.
Quick-start checklist
Use this checklist to make your first real estate video today. Each item takes a few minutes, and the whole list fits in one afternoon.
- Write one sentence naming the goal and the buyer
- Build the eight-shot list from the tour order above
- Set the phone to 4K, 30 fps, grid on, vertical
- Open blinds, turn on lights, wipe the lens
- Film each shot twice, slow and steady
- Trim clips to two or three seconds and cut to the music
- Burn in captions and add price, beds, baths, and address
- End on your contact card and export vertical
- Post the vertical cut and repurpose the square and landscape cuts
Run the list once and you have a routine. Run it on five listings and you have a content habit that compounds, because every video teaches you a sharper hook for the next one.
Publish to the right platform
Publish each cut where it performs: the vertical cut to Reels, TikTok, and Shorts, the square cut to the main feed, and the landscape cut to your listing page and YouTube. One project covers a full week of posts.
Match the format to the platform so nothing gets cropped. Reels and TikTok take the 9:16 vertical cut and reward two to four posts a week, the 1:1 square cut sits well in the feed and in email, and the 16:9 landscape cut anchors your listing page. The real estate videos for social media guide sets a weekly cadence.
Write the caption for the buyer. Open with the headline feature, add the price and the neighborhood, and close with a clear next step such as a link to book a showing. Add five to ten local hashtags and pin your best video to the top of your profile.
Time the post for when buyers scroll, usually early evening on weekdays and late morning on weekends. Reply to the first few comments within the hour, because early engagement tells the platform to show the video to more people.
Set a strong cover frame before you post, because the thumbnail decides the tap. Pick the brightest exterior or the kitchen, add a short text hook, and keep that style consistent so your profile grid reads as one brand.
Frequently asked questions
Plan a short shot list, film the key rooms on a phone in 4K, edit the clips with music and captions in a free app, then publish a vertical cut to social and a horizontal cut to your listing page. You can also auto-make one from listing photos in about two minutes.
Set the phone to 4K at 30 fps with the grid on, lock exposure and focus by tapping and holding, open blinds and turn on lights, then walk slowly through each room holding the phone with both hands or a small gimbal.
Free editors like CapCut, Canva, and InShot handle cuts, music, and captions. To skip filming entirely, PropFade auto-makes a listing video from your photos and exports three formats at once.
Keep social cuts between 30 and 60 seconds, a just-listed teaser around 15 to 20 seconds, and a full property tour under two minutes. Shorter cuts hold attention and travel further.