A real estate walkthrough video moves a buyer through the property in showing order, giving them the feel of a tour before they book a visit. A focused walkthrough runs 60 to 90 seconds for social and up to three minutes for a full online listing, and a modern phone handles all of it.
This guide covers every step: what separates a smooth walkthrough from a flat one, how to film room by room on a phone, how to edit for pace and captions, and a photo-only path that renders a finished video without any filming. For the full landscape of real estate video formats, the pillar hub is the right starting point.
What makes a great real estate walkthrough video
A great walkthrough flows in showing order, stays smooth through every room, and uses narration to name the features that move a buyer toward a showing. Flow, stabilization, and narration are the three pillars.
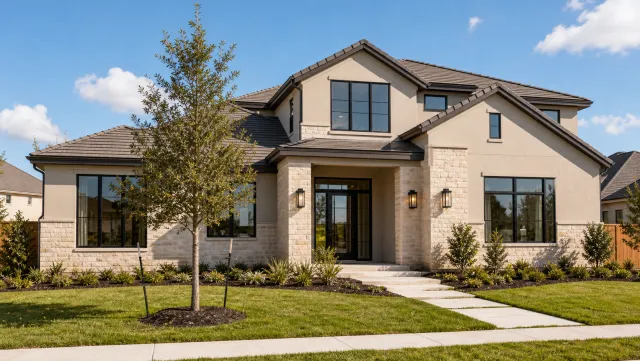
Flow means filming in the order a buyer walks the home: front exterior, entry, kitchen, main living area, primary suite, one standout feature, then a closing exterior or backyard. Jumping between rooms out of sequence reads as disorganized on camera just as it does in person. Treat the shot order as a script.
Stabilization is what separates a watchable walkthrough from one that causes viewer fatigue. Handheld shake on a phone is visible and distracting, especially when the camera moves through tight hallways or up a staircase. Walk heel-to-toe with elbows tucked into your ribs to absorb motion, or add a small gimbal for under 40 dollars for the smoothest possible result.
Narration connects the visuals to the buyer’s actual decision. A voiceover that names the kitchen dimensions, the age of the roof, and the school district adds the facts a buyer needs to progress from viewing to scheduling. A 90-second walkthrough narration runs about 180 to 200 words at a conversational pace, enough to cover every room and two or three standout features. Record narration after filming, in a quiet room, so on-site echo and exterior traffic do not bleed into the audio.
A linear walkthrough and a real estate video tour are related formats: the walkthrough moves through the property in sequence, while a tour can cut to highlights. Both start with the same room-by-room shot list.
How to film a walkthrough on your phone, room by room
Film a walkthrough on a phone set to 4K at 30 fps, with the grid on and exposure locked. Open every blind before the first shot and walk heel-to-toe through each room for stable footage.
Prepare the phone before you arrive. Set the camera to 4K (1080p if storage is tight), 30 fps for natural motion, and grid on to keep doorways and horizons level. Wipe the lens on your shirt before entering the property: a single fingerprint smears bright kitchens and blows out windows.
Lock exposure and focus by tapping and holding the subject in each room before you start moving. This prevents flickering as you walk past windows, which is the most disruptive exposure problem in walkthrough footage. If your phone has a manual lock icon, use it.
Open every blind, turn on every light. Shoot midday when possible and keep windows behind the camera or off to the side so daylight lights the room instead of blowing out the background. A well-lit room films cleanly even without extra gear. Closets and bathrooms are easy to forget: turn those on too.
Shoot each room in two passes: a wide entry shot from the doorway and a slow push or pan into the space. Then capture one close detail shot per room (the countertop edge, the fireplace surround, the light through a transom window). On a two-bedroom condo, the full property takes under 20 minutes to film.
For phone settings and stabilization basics in depth, the guide on how to make a real estate video covers the full phone setup. The real estate video editing guide picks up the post-production side.
| Room or area | Shot type | Notes |
|---|---|---|
| Exterior approach | Wide push-in | Open with the curb appeal hook |
| Front entry | Step-inside reveal | Pause after the door opens |
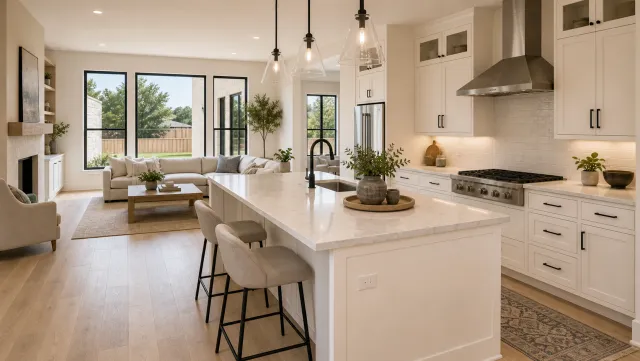
| Kitchen | Wide plus detail | Show counters, island, and light |
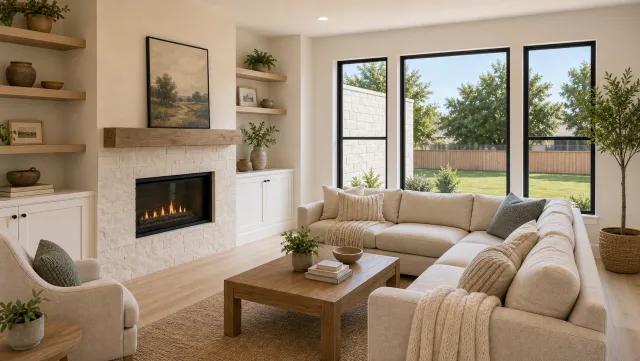
| Main living area | Wide then slow pan | Keep windows behind or beside the camera |
| Primary suite | Doorway reveal | Add one closet or bath detail |
| Secondary rooms | Wide pass | Show scale without lingering |
| Standout feature | Detail shot | Fireplace, pool, renovated bath, or view |
| Backyard or closing exterior | Wide closer | End with the best outdoor frame |
Edit the walkthrough: music, pacing, and captions
Edit a real estate walkthrough by trimming clips to two to four seconds, cutting on the beat of a licensed music track, and burning in captions for the majority of social viewers who watch without sound.
Trim first. Import your clips, drop them in shot-list order, and cut each one to two to four seconds. Clips that linger past four seconds stall the pace on a phone screen. If a room takes more than four seconds to show, split it into a wide shot and a detail shot so the cut keeps the viewer moving.
Add music early and cut to the beat. A moderately upbeat track sets the emotional tone for the listing. Use a licensed library (most phone editing apps bundle one) so the video stays monetizable on YouTube and Reels. Keep the music level slightly below any voiceover so the narration stays intelligible.
Burn in captions and key facts. Most social viewers watch without sound, so text overlays carry the message for a large share of your audience. Add the price, bed and bath count, and address as on-screen text in the first ten seconds. Use auto-caption for any spoken narration. Keep fonts large enough to read on a phone screen at arm’s length.
Give the edit one quick color pass: nudge brightness and warmth to a consistent level across rooms, since clips shot near windows often come out cooler than the rest. An even, well-lit look signals a well-maintained home.
An ai real estate video editor can apply color grading, sync music, and generate captions automatically if you want to skip the manual edit pass.
Quick-start checklist for your first walkthrough video
This checklist covers every prep step across three phases: before you arrive, at the property, and in the edit. Each item prevents a specific reshoot or export mistake.
Before you arrive:
At the property:
In the edit:
Walkthrough video checklist
- **Before you arrive:** Confirm price, bed count, bath count, square footage, and the home's standout feature
- **Before you arrive:** Build the eight-shot list in showing order
- **Before you arrive:** Charge the phone to 100 percent and clear at least 5 GB of storage
- **Before you arrive:** Bring a gimbal or practice the heel-to-toe walk
- **At the property:** Open all blinds and curtains before filming the first room
- **At the property:** Turn on every interior light, including closets and bathrooms
- **At the property:** Wipe the phone lens before each new room
- **At the property:** Tap and hold to lock exposure and focus for each shot
- **At the property:** Film each room: one wide plus one detail
- **In the edit:** Trim all clips to two to four seconds
- **In the edit:** Cut on the beat of a licensed music track
- **In the edit:** Add price, beds, baths, and address in the first ten seconds
- **In the edit:** Run auto-captions on any spoken narration
- **In the edit:** Export vertical 9:16 for social and landscape 16:9 for the listing page
Browse real estate video examples across price ranges and property types before you shoot your first walkthrough.
Common walkthrough mistakes and how to fix them
The most common real estate walkthrough mistakes are shaky footage, clips that run too long, dim rooms, missing captions, and the wrong orientation for the target platform. Each has a one-step fix you can apply before you export.
| Mistake | What it looks like on screen | Fix |
|---|---|---|
| Shaky footage | Camera wobble through hallways and stairs | Heel-to-toe walk, elbows tucked, or a small gimbal |
| Clips over 4 seconds | Pace stalls, viewers tap away mid-room | Trim to 2-4 seconds; split long rooms into wide plus detail |
| Dim rooms | Flat colors, small-feeling spaces | Open all blinds and lights before the first shot |
| No captions | Key facts missed by mute viewers | Burn in price, beds, baths; auto-caption spoken narration |
| Wrong orientation | Portrait video pillarboxed on social platforms | Film vertical 9:16 for Reels and TikTok; 16:9 for listing pages |
| No call to action | Viewers watch and leave | End on your contact info or a booking link every time |
| Filming into windows | Background blows out, subject goes dark | Face away from windows and use the natural light behind the camera |
Fixing all seven produces a walkthrough that reads as professional even when filmed entirely on a phone. For guidance on distributing the corrected video, the real estate video marketing guide covers platform-by-platform strategy.
Skip filming: make a walkthrough from listing photos
PropFade turns a set of listing photos into a walkthrough-style video with animated motion, a drafted voiceover built from the listing details, and three exported formats ready for social and the web. No camera, lighting setup, or editing time required.
Upload 12 to 20 listing photos, confirm the listing facts (price, beds, baths, address), and export. PropFade renders a 9:16 cut for Reels, a 1:1 cut for the feed, and a 16:9 cut for the listing page, all from one project in about two minutes.
This path fits listings where filming is impractical: vacant homes, bad weather, a full showing schedule, or several active listings in the same week. The output delivers the same room-by-room flow from your MLS photos, with voiceover and captions built in.
5 listing photos
1 finished video
Make a walkthrough from photos
Upload your photos and get a finished video back in about two minutes.
Frequently asked questions
Film each room in showing order on a phone set to 4K at 30 fps, with exposure locked and every light on. Trim clips to two to four seconds, cut to a music track, and burn in captions with the price and bed count. Export a vertical cut for social and a landscape cut for the listing page. Plan about an hour the first time, including filming, trimming, captions, and export.
A phone from the last three to four years covers the basics: 4K video, good low-light performance, and a stabilized lens. Two upgrades that pay off quickly are a small gimbal (around 30 to 40 dollars) for smooth movement through tight rooms, and a clip-on microphone for any on-camera narration. Good lighting comes from open blinds and all interior lights on, not from external gear.
Keep social cuts between 60 and 90 seconds for Reels and TikTok, where the algorithm rewards high-completion rates on short videos. A full listing walkthrough posted to your website or YouTube can run up to three minutes. A just-listed teaser that highlights one or two rooms works best at 15 to 20 seconds.