A real estate video tour is an edited clip, typically 60 to 90 seconds, that walks a buyer through the property in a natural shot-by-shot sequence. This guide covers how a tour differs from a walkthrough and a virtual tour, the five steps to make one, the best tools and hosting options, the common mistakes, and how to distribute each format across every platform where buyers search.
Video tour vs virtual tour vs walkthrough: the key differences
A video tour is a linear, edited clip filmed and published by the agent. A virtual tour is an interactive 360-degree experience the viewer navigates at their own pace. A walkthrough is continuous, unedited footage shot in a single pass. Each format suits a different platform and a different buyer context.
Video tour. You edit a video tour before publishing. You choose the shot order, trim clips to two to three seconds, and add music, captions, and your brand. The result plays on any platform: Reels, email, a listing page, or YouTube. Buyers consume it passively, the same way they watch any short video.
Virtual tour. A virtual tour uses 360-degree photos stitched together so the buyer clicks or taps to move through the home. They control what they see and when. Virtual tours show spatial relationships well, but they require a compatible browser or app and a stable connection. Companies like Matterport and iGuide build them.
Walkthrough. A real estate walk through video is continuous footage filmed room by room without editing. Agents live-stream walkthroughs or post them raw. They are faster to produce than an edited tour but look less polished when posted alongside finished listing content.
For most listings, use a video tour on social and the listing page, a virtual tour for buyers who want to self-navigate before a showing, and a walkthrough for speed when editing time is limited.
This page focuses on the edited video tour. For the full range of real estate video formats, including reels, agent intro clips, and neighborhood videos, the pillar hub maps every type.
How to make a real estate video tour in five steps
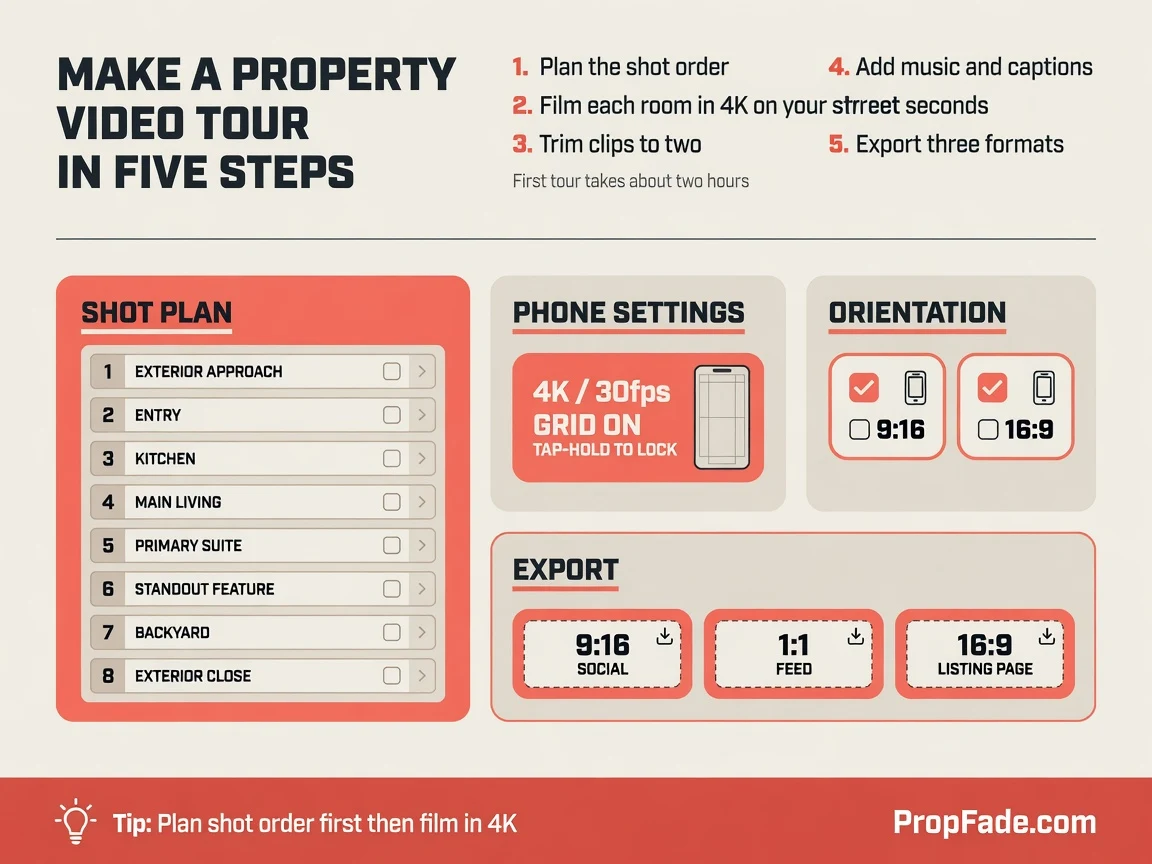
Make a property video tour in five steps: plan the shot order, film each room in 4K on your phone, trim clips to two to three seconds, add music and captions, then export three formats. A first tour takes about two hours; a repeatable routine brings that under one.
Step 1: Plan the shot order
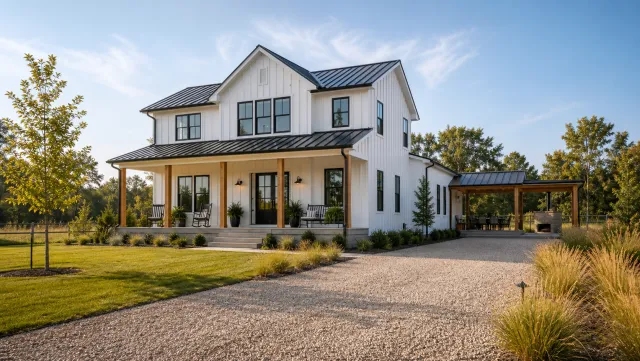
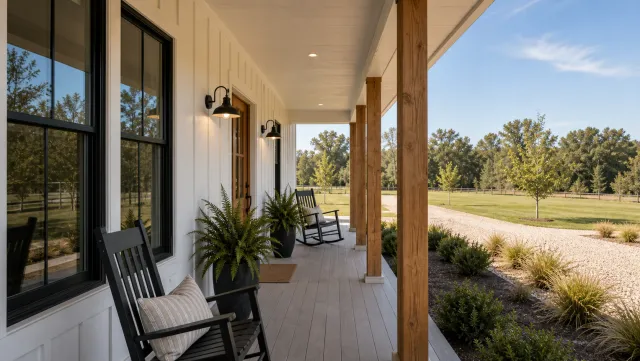
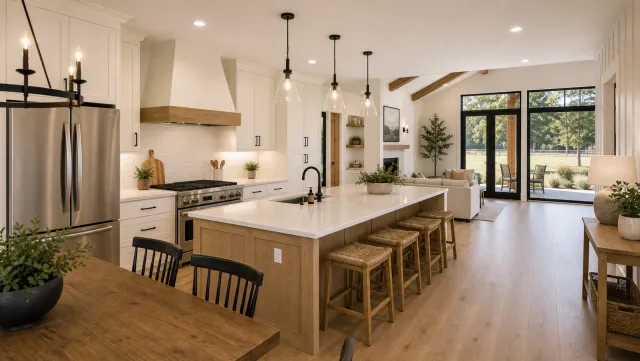
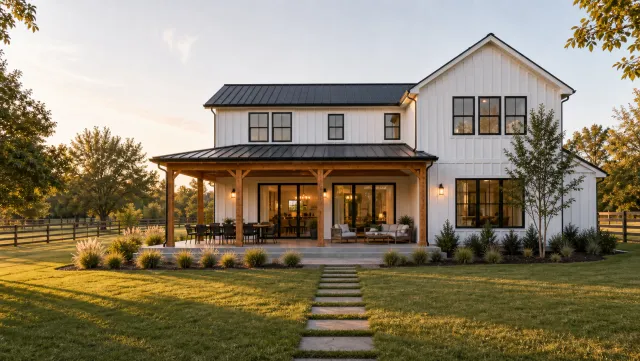
Build the shot list in the order a buyer walks the home: exterior approach, entry, kitchen, main living space, primary suite, the standout feature, and the backyard or view. These eight scenes are the structure of the tour; each scene yields two to four clips, so plan for 20 to 30 clips total across a 60-to-90-second edit.
Decide orientation before you leave. Vertical 9:16 fills the screen on Reels, TikTok, and Shorts. Horizontal 16:9 suits the listing page and YouTube. If you film only once, film vertical to cover Reels and TikTok and crop a 1:1 square from the center. For a clean 16:9 listing-page cut, either make a second horizontal pass through the main rooms or use a photo-to-video workflow that renders all three formats from listing photos without a second shoot.
Confirm the listing facts before you arrive: price, bedroom and bathroom count, square footage, and the one feature the seller leads with. Those details become the caption track and any on-camera voiceover.
Step 2: Film each room
Set the phone to 4K at 30 frames per second, turn on the grid, and tap and hold the subject to lock exposure and focus. Open every blind, turn on all interior lights even in daytime, and walk slowly heel to toe with the phone held in both hands. For a deeper treatment of phone settings and lighting techniques, the how to make a real estate video guide walks through each setting.
Capture doorway push-ins between rooms and detail shots, the countertop edge, the fireplace, the light falling through a window, because short detail clips make the edit feel produced without adding complexity.
Step 3: Edit to pace
Import the best takes and trim each to two to three seconds. Arrange them in shot-list order and place a licensed, upbeat track underneath. Cut so the transitions land on the beat: sync the clip change to the kick drum or a chord change and the video feels professional regardless of budget.
Add captions and on-screen text. Around 80 percent of social viewers watch on mute, so burn in the price, bedroom and bathroom count, and address. Keep the font large and high contrast so it reads on a small screen in bright light.
Give the footage a quick color pass before exporting. Nudge brightness and warmth so every room looks consistent, since clips shot near windows often run cooler than interior shots.
Step 4: Auto-make from photos
To skip filming entirely, upload 12 to 20 listing photos to PropFade. The platform animates each photo with motion, drafts a voiceover from the listing data, adds captions, and renders three formats in about two minutes: a 9:16 cut for social, a 1:1 cut for the feed, and a 16:9 cut for your listing page.
This path fits listings where filming is hard: vacant homes in bad weather, a back-to-back showing schedule, or several properties going live the same week.

5 listing photos
1 finished video
Create a video tour
Upload your photos and get a finished video back in about two minutes.
Step 5: Export and label
Export at 1080p minimum. Label each file by format: listing-123main-916.mp4, listing-123main-11.mp4, listing-123main-169.mp4. Save the project as a template so every new listing keeps the same intro font, color palette, music, and end screen.
Tools and hosting for your property video tour
For filming, a recent iPhone or Android shooting in 4K is enough. For editing, CapCut, Canva, and InShot each handle cuts, music, and captions with a mobile-first interface; each requires manual work per listing and more time per format than an automated workflow. For hosting, YouTube and Vimeo accept the finished file and return an embed link you can place on any listing page.
CapCut handles cuts, beat-sync, on-screen text, and multi-format export in one app. Canva offers branded templates where you can lock your logo, font, and color palette so every listing video matches your brand. InShot is faster for quick trimming and trimmed-down edits. An ai real estate video editor automates color correction, caption generation, and multi-format export when you manage several listings at once.
| Platform | Max resolution | Privacy option | MLS-friendly |
|---|---|---|---|
| YouTube | 4K / 2160p | Unlisted, link only | Yes |
| Vimeo | 4K / 2160p | Password or private | Yes |
| Wistia | 4K | Private, no sidebar | Yes |
| Direct CDN | Your upload limit | Full control | Yes |
YouTube works for most listings: globally cached and an easy embed on any listing page. Use Vimeo or Wistia when you want a white-label player with no related-video sidebar.
Before adding any video URL to an MLS listing, check your board’s field rules. Most boards restrict public remarks to property descriptions and prohibit external links entirely; branded video URLs typically belong in private agent remarks if the board permits them, or in a board-approved media field. The virtual tour field in most MLS systems is reserved for unbranded 360-degree tour URLs that syndicate to portals like Realtor.com. Some portals, including Zillow, have their own video upload tools that bypass the field question.
Common video tour mistakes and how to fix them
The four most common video tour mistakes are clips longer than three seconds, shaky handheld motion, missing captions, and the wrong aspect ratio for the platform. Each fix takes under a minute once you know what to look for.
Clips too long. Buyers scroll past anything that lingers. Trim any clip running over three seconds by half. The pace keeps the viewer watching; the story lives in the captions and audio.
Shaky footage. Hold the phone with both hands, tuck your elbows in, and walk heel to toe. A small gimbal in the 30 to 60 dollar range removes the remaining shake. Review the first room on the phone screen before moving on so you catch the problem early.
No captions. Watch the finished video on mute and ask whether you could understand the listing without sound. If not, add captions. Burn them in rather than relying on platform auto-captions, so they appear in every player and in every embed.
Wrong aspect ratio. Uploading a 16:9 clip to Reels produces black bars on both sides. Export the 9:16 cut for vertical platforms and the 1:1 cut for the grid. Label files by format before exporting so you load the correct file each time.
Flat, inconsistent lighting. Turn on every interior light even in daytime, open all blinds, and film away from bright windows. Consistent, warm light makes rooms read as larger and makes the edit look uniform from clip to clip.
Burying the standout feature. Every listing has one detail that makes buyers say yes: the kitchen island, the primary bath, the backyard view. Put it near the end as the emotional close, not in the middle where it gets skimmed past.
Real estate video tour examples: what strong ones have in common
Strong real estate video tours open on the exterior, move through the home in buyer-walk order, and close on the standout feature. They run 60 to 90 seconds and carry captions throughout. These structural choices repeat across the best real estate video examples regardless of price point or property type.
The best tours share three consistent decisions. They open on the exterior so the buyer anchors the address visually before walking inside. They end on the standout feature, not a generic bedroom shot, but the specific detail that differentiates this listing. They display the price, bedroom count, and address as on-screen text within the first five seconds.
Budget and price point affect style, not structure. A $350,000 townhome tour and a $2M waterfront tour follow the same eight-scene structure. The higher-price tour paces slower, uses wider angles, and lingers on finishes. The buyer audience changes; the shot order and caption discipline do not.
A strong caption track tells the full story on mute: “3 bed / 2 bath,” “renovated kitchen,” “south-facing backyard,” “asking $740K.” A viewer who watches only half the video still knows enough to decide whether to book a showing.
Photo-rendered tours follow the same structure: each photo animates with motion, the voiceover pulls facts from the listing data, and the caption track is burned in before export. See output across property types on the real estate video examples page.
Distribute your tour: platforms, formats, and timing
Post the 9:16 cut to Reels, TikTok, and YouTube Shorts. Post the 1:1 cut to the Instagram and Facebook feed. Embed the 16:9 cut on your listing page and add the YouTube URL to the appropriate MLS field per your board’s rules. One project covers four distribution channels and a full week of content.
Reels and TikTok. These platforms reward recency: post within 24 hours of the listing going live. A 60-second tour with captions, a price overlay, and a location tag reaches further than a raw walkthrough. Two to four posts per week keeps the listing visible while inventory lasts.
Instagram and Facebook feed. The 1:1 cut fits the grid without cropping. Open the caption with the standout feature, add the price and neighborhood, and close with a clear action such as “link in bio to book a showing.”
Listing page and MLS. Embed the 16:9 cut above the fold on your single-property page. For MLS distribution, add the YouTube URL to private agent remarks if your board permits external links, or use the board-designated media upload field; avoid public remarks, which most boards restrict to property descriptions.
Email. Drop a thumbnail with a play button graphic into listing-alert emails and link it to the full tour. A video thumbnail in email lifts click rates on listing updates compared with a static photo.
Timing. Post early evenings on weekdays and late mornings on weekends for best organic reach. Reply to the first few comments within the hour; early engagement signals the platform to extend the video’s distribution.
Frequently asked questions
A real estate video tour is an edited video clip, typically 60 to 90 seconds, that walks a buyer through a property in shot-list order with music, captions, and on-screen text showing the price, bedroom count, and address. It plays on any platform and differs from a virtual tour, which is an interactive 360-degree photo experience the viewer navigates by clicking.
Film each room in shot-list order on a phone set to 4K at 30 fps with the grid on and exposure locked. Trim each clip to two to three seconds in an editing app, add a licensed music track and captions, then export three formats: 9:16 for Reels and TikTok, 1:1 for the Instagram and Facebook feed, and 16:9 for your listing page. To skip filming, upload 12 to 20 listing photos to PropFade and get all three formats rendered in about two minutes.
A video tour is a linear, edited clip that plays from start to finish like a short film. A virtual tour uses 360-degree photos that the viewer navigates by clicking or tapping to move through the home at their own pace. Video tours work on any social platform or in email; virtual tours require a compatible browser or app and a stable internet connection.