A loft listing video brings scale to life: the open floor plan, the ceiling height, the exposed brick under natural light. These 10 ideas are written for loft properties specifically, with a shot list and copy-paste captions included.
Best video ideas for a loft listing
The strongest loft videos lead with the floor plan reveal, show ceiling height, and step to the windows for the neighborhood view. Ten ideas cover the full property: open space, industrial character, and urban location.
1. The floor-plan reveal. Film from the entry threshold and push forward slowly as the entire open space comes into view. This shot answers the buyer’s first question: how big does the loft actually feel? Keep the camera level and the pace slow, about 5 to 8 seconds.
2. The ceiling-height tilt. Start the camera at the floor, then tilt up to the exposed beams or the ceiling line. In a loft with 12 to 14-foot ceilings, the vertical distance reads as dramatic on screen in a way that a wide shot cannot match.
3. The window view. Walk toward the largest window and let the frame fill with the neighborhood outside. Urban views at midday or during golden hour show loft buyers why the location is part of the purchase. Shoot toward the glass so the sky or the city block fills the background.
4. The exposed-materials close-up. Film the brick, the concrete column, the steel beam, or the pipe run at close range for 3 to 4 seconds each. Industrial elements are the reason buyers choose a loft, and two or three close-up clips communicate the character faster than any description.
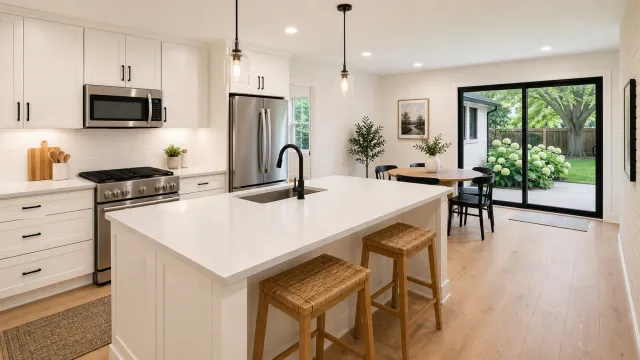
5. The open-concept kitchen float. Glide through the kitchen with the full living space visible in the background. The shot shows the open-plan relationship between the cooking area and the rest of the floor in a single take.
6. The mezzanine double reveal. If the loft has a sleeping mezzanine or raised level, film looking down from the upper level first, then looking up from the main floor. The two angles show how the space is organized and confirm the ceiling clearance below.
7. The building story. Walk the building approach, the lobby, or the freight elevator to place the unit in its converted-warehouse or industrial-building context. Loft buyers are purchasing the building as much as the unit itself.
8. The neighborhood walk. Step outside for 10 to 15 seconds of the block: the coffee shop across the street, the park, the transit stop. Location drives loft purchase decisions. Keep it short, handheld, and unscripted.
9. Natural light across the day. Film the main space at two different times of day if possible. A loft with large south-facing windows looks like a different property at 8 a.m. versus 2 p.m. Two visits of 10 minutes each add real depth to the edit.
10. The lifestyle moment. Stage one simple detail: a laptop on the kitchen island, a book on the window ledge with the city framed behind it. One staged detail anchors the emotional tone of the entire video.
Each idea works as a standalone clip or as part of a longer edit. Build the final video in the order a buyer would experience the property: exterior first, the reveal second, the main spaces next, and an emotional close last. That sequence mirrors the tour experience and holds attention through the full runtime.
Loft buyers are active comparison shoppers who typically tour multiple properties across several neighborhoods before requesting an in-person showing. A video that shows the ceiling height, the light direction, and the nearest transit stop addresses the questions buyers most commonly raise before scheduling a tour. Strong watch-through on a listing video is a reliable signal of serious interest. The ceiling-tilt shot helps buyers self-qualify: they arrive at the showing already knowing whether the vertical space works for them, which shortens the qualification conversation and improves show-to-offer conversion for the agent.

For step-by-step filming technique across each shot type, the real estate video how-to guide covers phone settings, movement, and editing from start to finish.
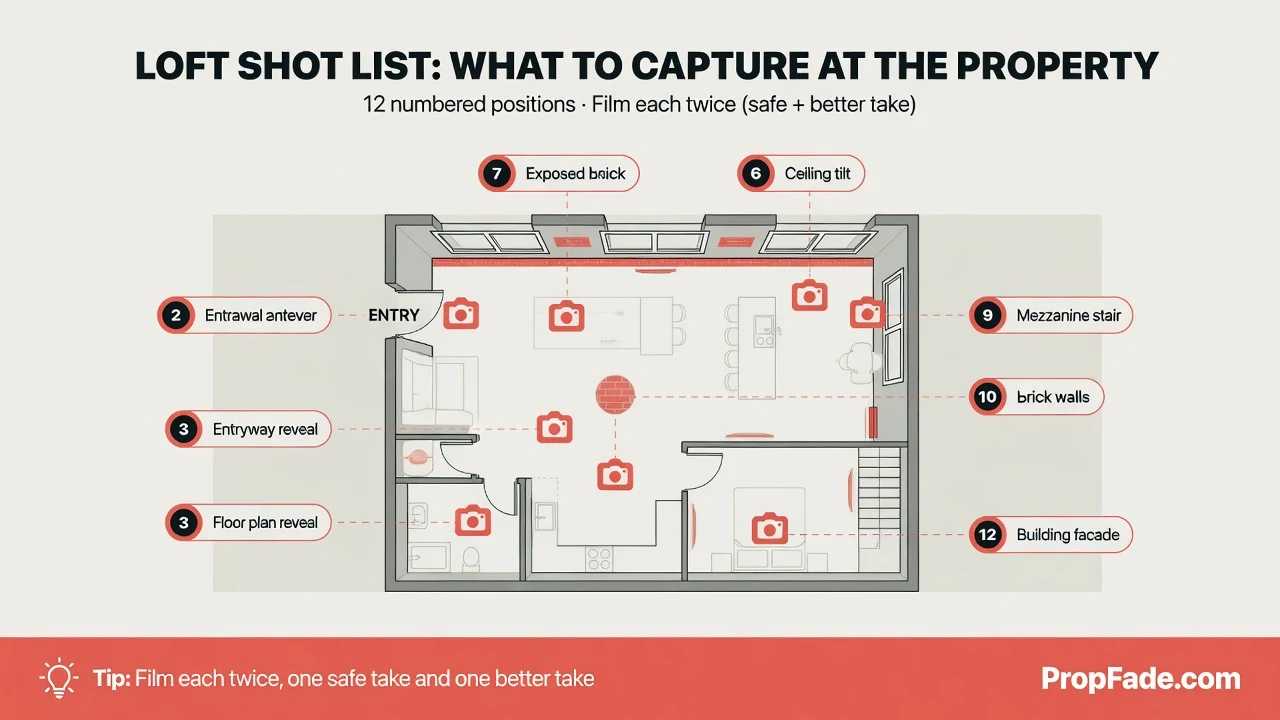
Loft shot list: what to capture at the property
A complete loft shot list runs 12 positions. Film each twice, one safe take and one better take, so you have options in the edit. Capture detail shots on-site because they are the hardest to recreate later.
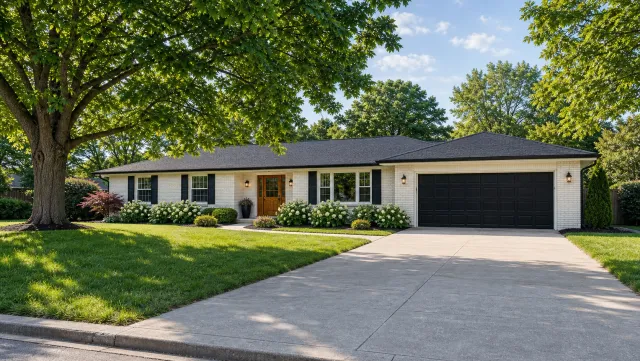
- Building facade and exterior signage
- Entry door, lobby, or freight elevator
- Front door opening into the full open space (the reveal shot)
- Wide angle from the farthest corner showing the entire floor
- Slow ceiling tilt from the floor to the beams or ceiling line
- Each large window, shooting toward the glass with the exterior behind it
- Exposed brick, concrete, or steel (one close-up each)
- Kitchen from the living side, showing the open connection
- Kitchen details: counters, island, appliances
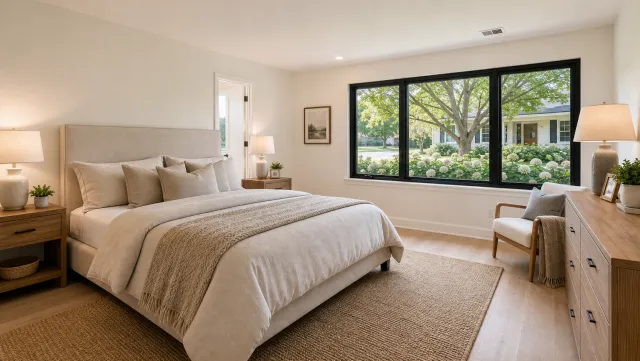
- Primary sleeping area, sleeping loft, or mezzanine
- Bathroom with any industrial or loft-specific finishes
- Outdoor space: rooftop, terrace, or balcony if available
Film the reveal shot first, before furniture is moved or blinds are adjusted. The first impression from the entry threshold is a one-time capture.
Loft spaces present two filming challenges: high-contrast light from tall windows against shadowed corners, and open areas that can lose depth in a wide shot. Lock exposure on the mid-tones before moving through each space, and use a wide-angle setting for the ceiling tilt and the full floor shot to preserve the sense of scale.
For the window shots, expose for the exterior view rather than the shaded interior. Tap the window frame on a phone camera, then drag the brightness slider down two stops until the ceiling and near wall come back into frame. This keeps the neighborhood view readable without losing the room detail. A loft with 12-foot ceilings reads most dramatically when filmed at roughly chest height, pointing upward at 15 to 20 degrees, which exaggerates the vertical sweep without distorting the walls. For north-facing lofts, schedule the shoot between 10 a.m. and 2 p.m. when indirect light reaches maximum brightness across the floor.
The real estate walkthrough video guide covers camera movement and stabilization through open spaces and tight hallways. For how each shot type maps to buyer intent, the real estate video marketing guide has the full breakdown.
The fastest way to make a loft listing video
PropFade turns a set of loft listing photos into a finished video in about two minutes. Upload 12 to 20 photos, confirm the address and listing details, and export all three formats at once.
This path is practical for vacant lofts. An empty industrial space can be challenging to film in a way that reads as warm or livable, and professional listing photos already show the space at its best. PropFade animates each photo with motion, generates a voiceover from the listing facts, adds captions, and renders a 9:16 cut for Reels, a 1:1 cut for the feed, and a 16:9 cut for the listing page.
Agents using PropFade for loft listings typically post the 9:16 cut to Reels first, since vertical video gets the widest organic reach on social. The 16:9 landscape cut goes to the listing page on the same day. The 1:1 square cut works well in email campaigns to buyer leads who are already in the funnel.

5 listing photos
1 finished video
The ai real estate video editor page explains how the animation and voiceover pipeline works. Finished examples across property types are on the real estate video examples page.
Make a loft listing video
Upload your photos and get a finished video back in about two minutes.
Captions and hooks for loft listings
These 12 captions are ready to copy for Reels, TikTok, and the feed. Each opens with a specific architectural or location detail, because specific facts stop a buyer mid-scroll.
Reveal hooks (use as the opening line):
- “High ceilings. Exposed brick. [Ceiling height] between you and the beams.”
- “Warehouse bones. Modern finish. [Address] is live today.”
- “The kind of open plan that actually feels open.”
- “Industrial details that improve with age. [Neighborhood].”
Tour openers (for walk-through Reels):
- “Welcome to [Address]. See why loft buyers ask about ceiling height first.”
- “Loft in [Neighborhood]. [Beds] bed, [Baths] bath, [Sqft] sq ft of original character.”
- “Step inside [Address] and let the space speak.”
Call-to-action closers (add to the end of any caption):
- “Full gallery and showing link in bio.”
- “Showings available by [Date]. DM [Agent Name].”
- “Just listed. DM for a private tour.”
Location-first versions:
- “[Neighborhood] loft. Steps from [Landmark]. Live today.”
- “You’re buying [City] as much as the unit. [Address].”
Each caption keeps the first sentence short enough to hold before the “more” truncation on Reels and TikTok. Replace every bracketed placeholder with the property’s verified listing details before posting, including [Ceiling height], which should match the measurement in the MLS data sheet. The reveal hooks work especially well as on-screen text overlaid on the ceiling-height tilt or the floor-plan reveal shot.
For a weekly posting cadence and format-specific hooks across every platform, the real estate video marketing guide covers the full social strategy. The real estate video hub has the complete resource set for listing video across all property types.
Loft listing video FAQ
These questions cover the three most common searches about loft listing videos, each answered for the specific character of open-plan industrial spaces.
Frequently asked questions
Start with a floor-plan reveal walkthrough. Open at the entry threshold, push slowly into the full open space, then cut to the ceiling height, the windows, and the exposed industrial materials. Keep the video at 60 to 90 seconds for Reels and TikTok, or up to 2 minutes for a full tour on YouTube and the listing page.
Post the vertical 9:16 cut to Reels, TikTok, and Shorts with a caption leading with a specific detail such as ceiling height or exposed brick. Use the 1:1 square cut in the feed and email, and use the 16:9 landscape cut on the listing page and YouTube. Three formats from one video session cover a full week of content.
Film vertical 9:16 first to cover Reels, TikTok, and Shorts, where most property discovery now happens. If you film one cut, film vertical and crop a 1:1 from it for the feed. Export 16:9 from the same project for the listing page and YouTube. PropFade exports all three formats from one photo upload.